Tweak materials and attributes
Override a material
Most of the time you start working from a base RenderGraph (like the default graph that comes with a new RenderGraph) and add it other branches according your needs. Adding branches to the main trunk is usually done using a special type of node that perfoms a binary operation on two incoming branches (or attributes flows) and returns a new attributes flow.
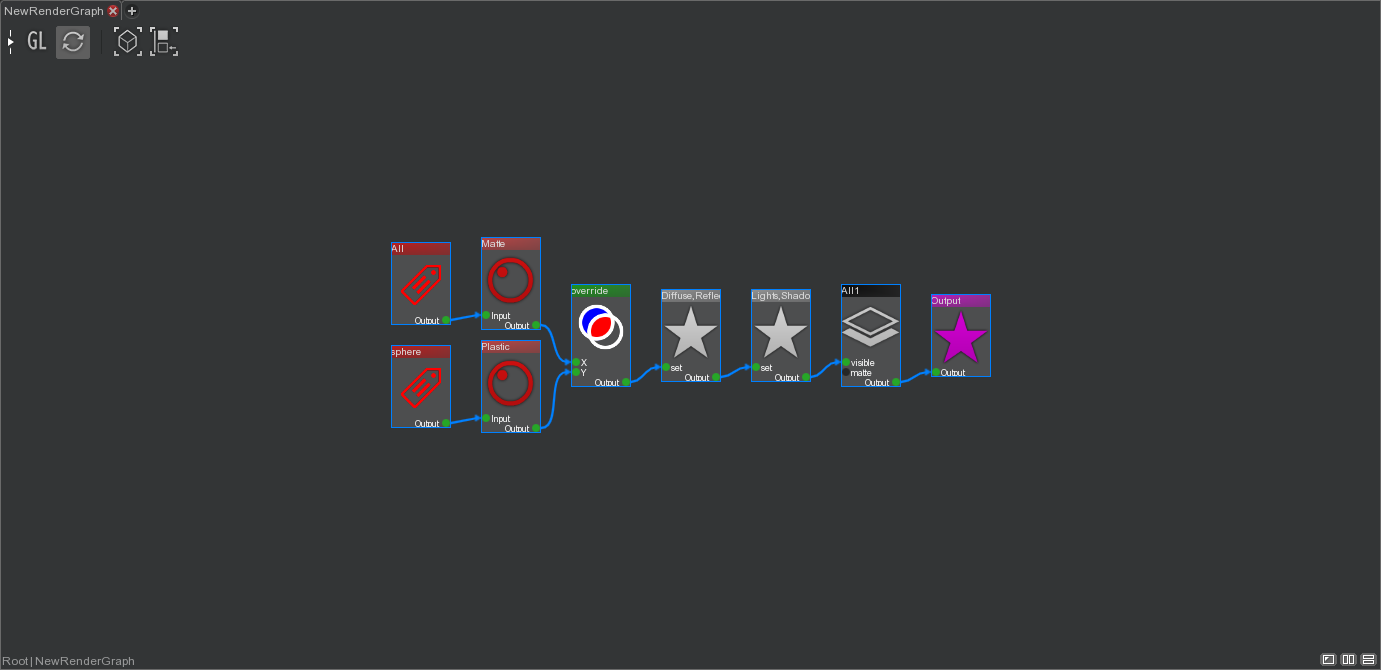
Let's assign a plastic material for the sphere and keep the matte for the plane. We will use the override Binop node.
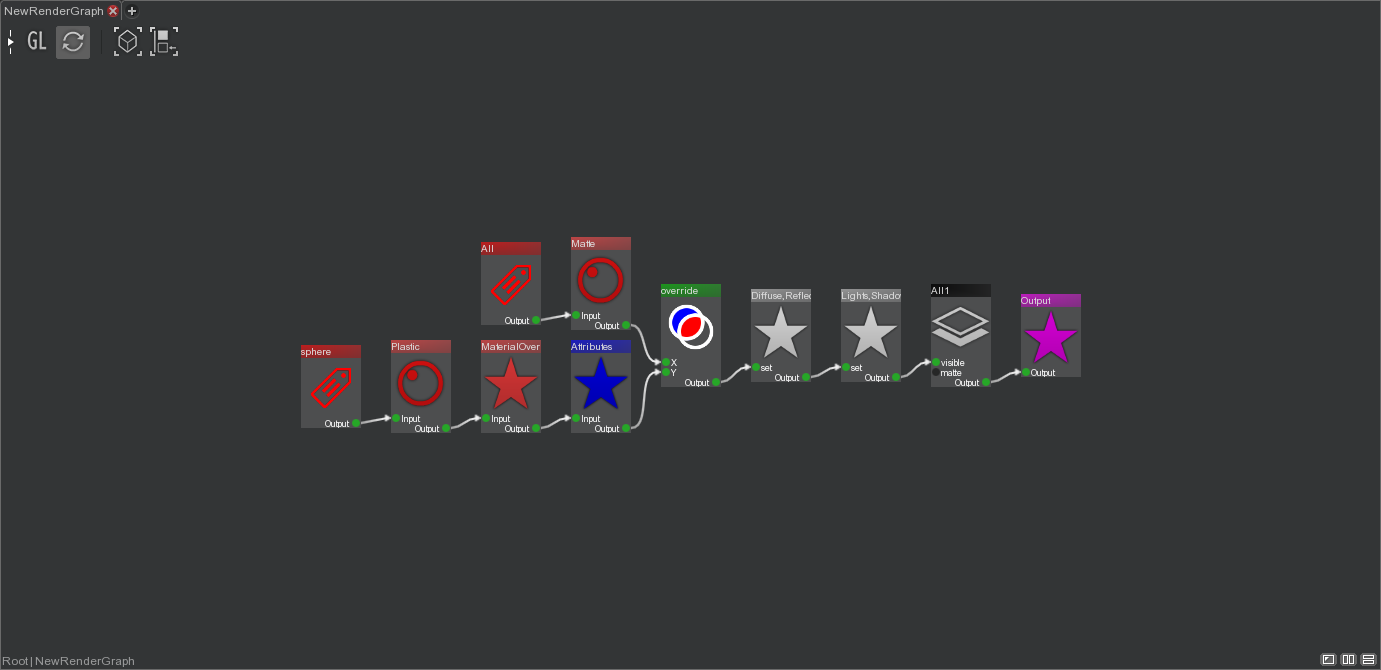
Use the Plastic material of the library.Drill down into the previous NewRenderGraph.Create a Tag node, a Plastic material node, a binop.override node andconnect them as in the graph below.- Select the Tag node and type 'sphere' in the Tag text box of a properties view.
- Render the image.
 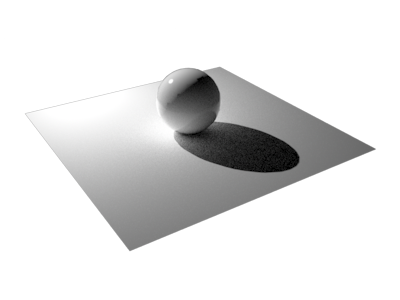 |
The sphere is now rendered with a white shiny plastic material.
This RenderGraph can be explained like this :
The Tag node sphere selects the sphere in the scene, since its Tag is sphere and and the sphere primitive owns this tag. The Tag node is connected to the Shader node, which assign the Plastic material to the selection, since its Mode is 'Set Material' and Shader is Plastic. The Plastic node is connected to the Binop override node and overrides the Matte shader assignation, since there is an active shader assignation coming in X. Etc, ...
Tweak a material
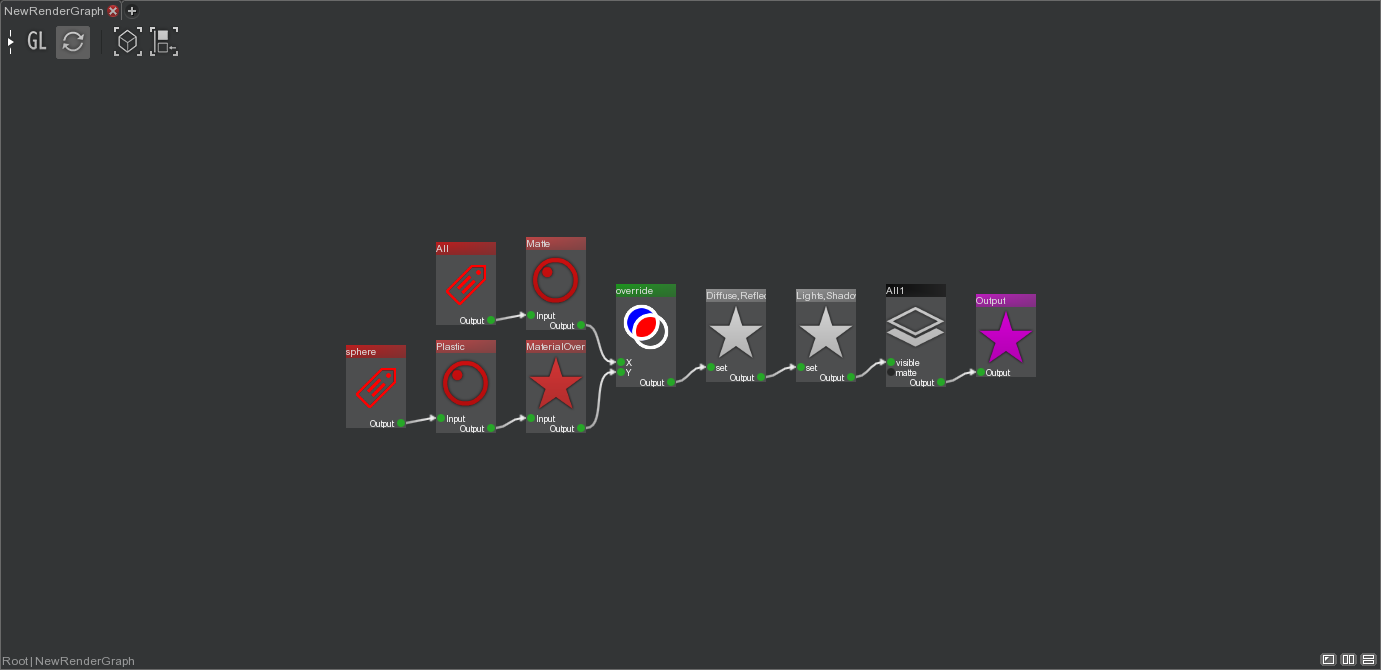
Let's change the color of the plastic material to a bluish color, as well as its roughness. This is done using an MaterialOverride node. The MaterialOverride node is able to modify any exposed value of a Material, in our case, the Albedo color and Roughness of the Plastic material.
Drill down into the previous NewRenderGraph.Create a MaterialOverride node andconnect it as in the graph below.- Select the MaterialOverride node and type 'Albedo' in the text box and choose Color in the combo box and click on Add button of a properties view.
- Select the MaterialOverride node and type 'Roughness' in the text box and choose Float in the combo box and click on Add button of a properties view.
- Change color to a bluish color and float value to 0.3.
- Render the image.
 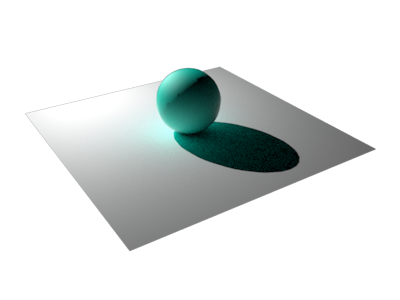 |
The sphere is now rendered with a bluish matte plastic. You can notice the sphere is diffusing light on the plane.
This RenderGraph can be explained like this :
The Tag node sphere selects the sphere in the scene, since its Tag is sphere and and the sphere primitive owns this tag. The Tag node is connected to the Shader node, which assign the Plastic material to the selection, since its Mode is 'Set Material' and Shader is Plastic. The Plastic node is connected to the MaterialOverride node and overrides the Albedo and Roughness values of the Plastic material. The MaterialOverride node is connected to the Binop override node and overrides the Matte shader assignation, since there is an active shader assignation coming in X. Etc, ...
Tweak attributes
Let's change the smooth attribute and subdiv level on the sphere. This is done using an Attribute node. A RenderGraph Attribute node holds a subset of the attributes found in a property view of a node. Any attribute found in the node can be changed, like geometric attributes, smooth, etc.
Create an Attributes node andconnect it as in the graph below.- Select the Attributes node and change 'Smooth > Smooth' to checked and 'Raytracing > Subdivision Level' to 1.
- Render the image.
  |
The sphere is now rendered with smoothing and 1 level of subdivision. If you look good you will notice that the casted shadow on the plane is more round and less edgy than previously.
This RenderGraph can be explained like this :
In the branch that selects the sphere there is an Attributes node, which enables the 'Smooth' attribute and set the 'Level of Subdivision' attribute to 1.